How to Use Your iPad as a Second Monitor on Windows
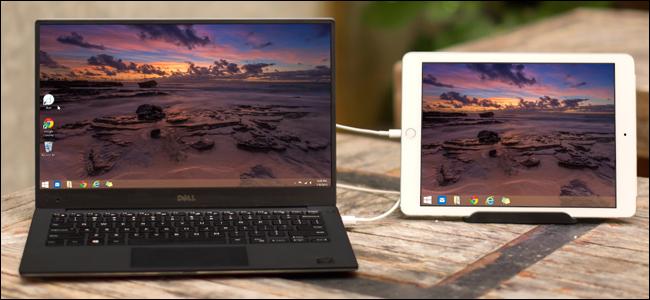
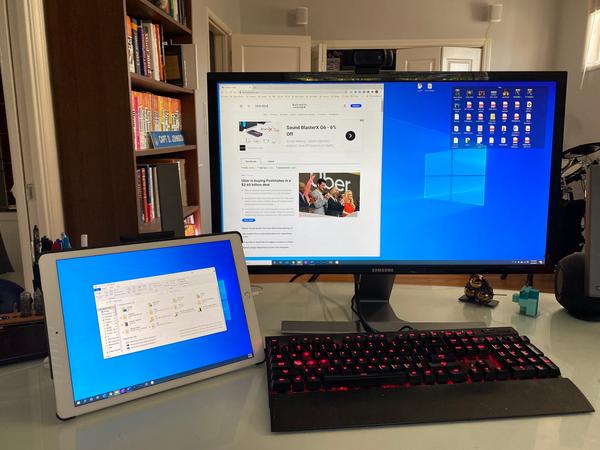
The iPad is something of an endless source of utility for every type of modern user. Whether it’s a gamer seeking the best iPad games or an Apple Pencil user wanting features like QuickNote, there’s something for everyone. Fortunately, there’s also something for the workforce out there. Working professionals like me frequently wish for an additional display to get more work done. However, if you don’t feel like shelling out a lot of extra money, your iPad can come to the rescue. Using your iPad as a second monitor is not only very easy but costs significantly less. So, here is how to use iPad as a second monitor on Windows:
How to Use iPad as a Second Monitor
In order for you to use your iPad as a second monitor, we will be using a paid app. However, if you’d like a free alternative, we have mentioned one in the article itself. Use the table below to navigate to it.
Whether you’re using your iPad as a second monitor or outfitting it as a multi-monitor setup, there are a lot of benefits to doing so. Some of these are:
If you’re in the habit of opening multiple applications you already know what a pain it can be managing everything on a single screen. Using your iPad as a second monitor essentially gives you another desktop that can help ease the burden on the single screen.
This is one benefit I can vouch for myself. Being in a job that requires me to draw context from multiple tabs at once, my iPad helps a lot here. Using my iPad as a second monitor gives me the ability to have multiple apps open. All I have to do is avert my gaze there and all the information is waiting for me. Moreover, since the additional display works just like an extended one, you get all the clipboard options too.
Hey, I’m not judging. If you’re in the habit of doing an activity on the side while you work, it’s perfect. Using your iPad as a second monitor means you no longer have to rely on just background sounds and can look at your iPad every now and then.
These are only some of the benefits you can derive from using your iPad as a second monitor. Once you hook it up, you can explore more yourself.
Before we get to the actual connection, there are a couple of things we need. I have created a small checklist that you should tick off. Having all this software and hardware beside you will ensure you can use your iPad as a second monitor immediately.
The software we will be using is called Duet Display. While it is a paid software, it is an excellent one and works flawlessly. You can download Duet Display for your iPad ($9.99) and Windows (download). However, if you would like detailed instructions, scroll below and I’ll help you set it up.
In order to create a stable connection, it is advisable you download and install iTunes on your Windows PC. Use the links below to install iTunes and simply have it open in the background for the later steps.
Download iTunes: Microsoft StoreDownload iTunes: Apple Official
Using your iPad as a second monitor undoubtedly uses battery from both your devices. Since we will also be downloading and installing software or two, I recommend fully charging your devices before we begin.
We will need to establish a physical connection between your iPad and Windows PC. In order to use your iPad as a second monitor effectively, use the cable that came with your iPad for the steps below.
Let’s begin by setting up Duet Display on the iPad first. Follow the steps below to do so:
1. Open the App Store on your iPad.
2. Using the search bar, find and tap Duet Display.
3. Tap the blue button to purchase and install Duet Display.
4. Once installed, tap the Open button to begin.
1. Press Next on the first screen that appears.
2. Depending on your preferences, tap Accept or Not Now.
3. You can skip the sign-up and simply tap Connect on the bottom right.
4. Tap OK when Duet asks to access Bluetooth.
Duet Display on iPad has been set up and is ready to use. Just a few more moments before you use your iPad as a second monitor.

Setting up Duet Display on your Windows PC is as easy as the iPad. Since we have already purchased the software on the iPad, we won’t need to do it again. Simply follow the steps below to download and install Duet Display on PC.
1. Visit Duet Display’s official website (Click Here)
2. Once there, click the Windows button on the top right and the download will begin.
3. Once downloaded, click it once to start the setup.
1. Choose the desired path to where you want to install. Tick the license terms and press Install.
2. The setup will take a few minutes and will install Duet Display on your computer. Once it’s done, press the Finish button.
3. You must now restart to finish Duet Display’s setup. Since we will be using our iPad as a second monitor right now, I recommend pressing Yes and coming back to the guide once done.
Now that you’re back, you’ll like to know that Duet Display is installed and ready on both your devices. Let’s move on to connecting this all and making your iPad a second monitor.
Before we begin, make sure your iPad along with the lightning cable is nearby. Furthermore, turn on iTunes and just have it running in the background. If Apple asks you to sign in, do so. Now, follow the steps below to use your iPad as a second monitor.
1.Unlock your iPad and have it on the Home Screen.
2. Connect your iPad to the PC using the lightning to USB cable. If your iPad asks you to enter your passcode, do so.
3. Open Duet Display on your iPad and you will see the screen below. Simply leave your iPad be.
4. Open Duet Display on your Windows by double-clicking the shortcut.
5. Choose No from the Diagnostic pop-up that appears.
6. You can choose Yes if you would like the iPad to auto-connect wirelessly the next time. However, I recommend sticking to wired mode since it is lossless.
Do me a favor and look at your iPad. Congratulations, you’re now using your iPad as a second monitor! Since Windows will treat it as a separate desktop, you can use your existing mouse to iPad navigate the iPad. You can even use the iPad’s touch controls to use the second monitor!
Now that your iPad is being used as a second monitor through Duet Display, you can go ahead and adjust some finer settings. Since Duet Display uses power from both your iPad and the PC, it gives some options for adjustment. You can fine-tune options like Framerate, Performance, and even the resolution to suit your needs. Remember, the lower you go, the longer the iPad will run. However, I recommend keeping it at the original settings since the iPad has quite a big battery capacity.
And that’s it! You can now use your iPad as a second monitor whenever you wish. Just run Duet Display on both devices, hook them up and get to it. Happy productivity!
While you might be itching to use Duet Display on the iPad, I understand if you’re having second thoughts. After all, the app does charge $9.99. However, I have a solution for you. For the users who want to try using their iPad as a second monitor before they buy, there’s an alternative. Called Splashtop Wired XDisplay, the software does exactly the same thing but is free. Splashtop is also perfect for iPad users with older models and Windows 7 users.
However, Splashtop has been not been updated in over four years and is a bit laggy when compared to Duet Display. Still, if you’re looking to use your iPad as a second monitor and don’t mind the things above, you can give it a try.
Installing and using Splashtop Wired XDisplay follows the same steps as Duet Display. Simply download the app on both the App Store and Windows. You can then connect your iPad like before and it will start working. My experience with Splashtop was as I mentioned, a bit laggy but still manageable. Give it a try to use your iPad as a second monitor.
Get Splashtop Wired XDisplay: App StoreGet Splashtop Wired XDisplay for Windows: Website
While Windows requires additional software to use the iPad as a second display, Apple users can get this done much easily. The Sidecar feature available in macOS allows an iPad user to use it as a second monitor. You can either extend your display for more real estate or mirror your Mac desktop to get finer work done.
However, using Sidecar requires macOS Catalina or later. Moreover, you must have a compatible iPad using iPadOS 13 or later. Check out the full list of Sidecar system requirements to get a complete idea.
Sidecar, once set up, is extremely fluid and efficient. Users can easily start a Sidecar session, switch to screen mirroring, and adjust other finer aspects. Moreover, one of the best iPadOS 15 features — Universal Control — gives users the power to use a single mouse and keyboard across multiple Apple devices at the same time. Universal control works flawlessly across iPadOS and macOS Monterey.
Give Sidecar a try if you’re already in the Apple ecosystem. If you’re a Windows or Linux user, you can actually get macOS Monterey Universal Control on your devices as well.
Use Your iPad as Second Monitor and save Costs
Here’s hoping that using your iPad as a second monitor will help you save valuable time and money. However, remember that your iPad is capable of a lot more. Users wanting more productivity out of the iPad can check out the iPad’s new multitasking controls. Or if you feel like exploring check out how to use the new widgets on the iPad. How’s your experience with the iPad as a second monitor? Let us know in the comments below!
TAGSduet displayiPadsecond monitorLeave a comment}})