Mouse Not Working in Windows 11? Here’s How to Fix It
Windows 11 is posing to be a challenge for a lot of users. Earlier, for some users, the WiFi was not working in Windows 11, and then we also got reports of no audio output in Windows 11. Fast forward, and we are now hearing that the mouse is not working in Windows 11 for a few users. Further reports suggest that the mouse has become quite unresponsive and laggy for many after the Windows 11 update. In case, you are also suffering from mouse or touchpad-related issues on Windows 11, worry not. In this guide, we have included six reliable methods to resolve the mouse not working issue in Windows 11. So without any delay, let’s go ahead and find a fix.
Fix Mouse Not Working in Windows 11 (2022)
In this article, we have detailed 6 different ways to fix mouse-related issues in Windows 11. In addition, we have mentioned some crucial solutions for users who are having trouble with their touchpad. You can expand the table below and find all the solutions right here.
Table of ContentsIf you are using an external mouse on your Windows 11 laptop or desktop PC and the mouse is not working, you should begin with the most common fix. Have you tried connecting the mouse to a different USB port?
I have had many issues with the mouse being unresponsive in Windows, but switching to a different port has been a reliable solution for me in the past. If you have connected your mouse to a USB 3.0 port, I suggest you connect it to a USB 2.0 port for better compatibility, no matter if you are using a wired or wireless mouse. Of late, we have heard issues with the USB 3.0 port due to driver incompatibility.
Other than that, if you have an old computer that comes with a circular port (called PS/2 port), unplug the mouse and connect it again, ensuring perfect alignment with the connectors. You need to make sure that you are connecting the mouse to the green PS/2 port. The purple one is for connecting keyboards. So go ahead and plug in the mouse to a different port and see if it has started working on your Windows 11 PC.
If you are using a wireless mouse and it has stopped working in Windows 11, you should perhaps check if the mouse is turned on or not. A wireless mouse comes with a hardware switch on the back that lets you turn on or off the mouse to save battery. If the toggle is turned off, the mouse won’t work at all, no matter how many times you connect the adapter to a different port. If this solution didn’t work, you can also swap out the existing battery for a new one and see if the mouse works on your Windows 11 computer.
So you tried the common fixes, and it didn’t work? Don’t worry. Let’s now move to advanced methods to make the mouse or the touchpad functional in Windows 11. We will begin with uninstalling the mouse/ touchpad driver, and it should certainly fix the issue. Here is how to go about it.
1. Since the mouse is not working, you need to use various Windows 11 keyboard shortcuts, Tab, and the arrow keys to navigate between all the options. Begin with the “Windows + R” shortcut to open a Run window, typedevmgmt.msc, and hit Enter. This Run command will open the Device Manager window.
2. Under Device Manager, use the Tab and arrow keys to jump between options. Move to “Mice and other pointing devices” and press the right arrow key to expand the menu.
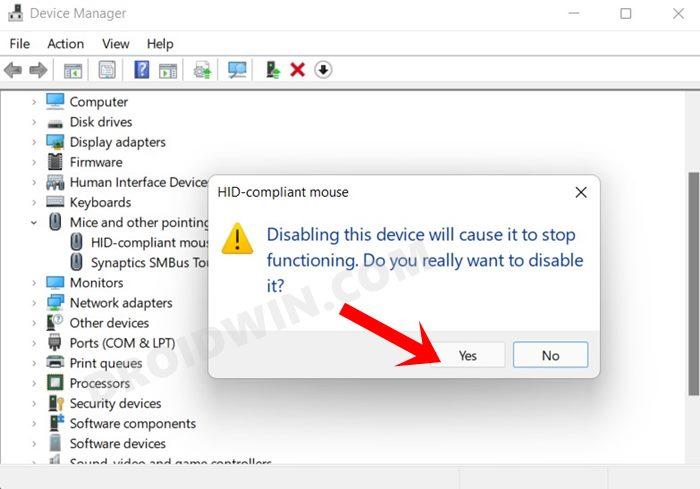
3. If you are using an external mouse, you will find an “HID-compliant mouse” entry here. And in case you have a Windows 11 laptop and are using a touchpad, a “Touchpad” or an “Input” device entry will show up. Now select the mouse using the arrow keys and use the “Shift + F10” or “Fn + Shift + F10” shortcut to open the context menu and choose “Uninstall device“.
4. In the next pop-up dialog, press Enter again, and the mouse driver will get uninstalled.
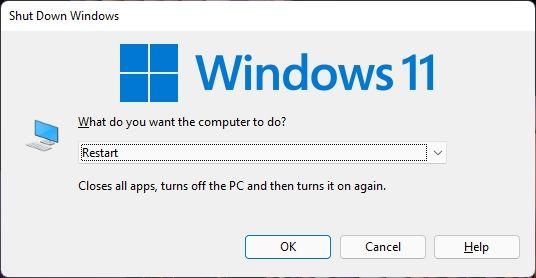
5. Finally, press “Alt + F4” and restart the computer. After the reboot, there is a high chance you will have fixed the mouse not working issue on Windows 11.
If the mouse is still not working in Windows 11 after performing the above method, you can try re-installing the driver locally for both the mouse and touchpad of your Windows 11 PC. Here is how to do it.
1. Open the Device Manager by following the above steps. Basically, rundevmgmt.mscin the Run prompt.
2. Next, expand the “Mice and other pointing devices” section. Here, depending on your mouse (HID-compliant mouse) or touchpad (Input device or Touchpad), open the context menu and select the “Update driver” option.
3. On the next page, press “Tab” to jump to the options and the arrow keys to switch between them. Choose “Browse my computer for drivers” and hit Enter.
4. After that, press “Tab” again and move to “Let me pick from a list of available drivers on my computer“. Now, hit Enter.

5. Choose the suitable driver for your touchpad or mouse, depending on the manufacturer, and click on “Next”.
6. Finally, the mouse driver will be installed. Now, press “Alt + F4” and reboot your PC. You will most certainly have a working mouse in Windows 11 upon using this method.
For users who are using a USB mouse on Windows 11, either wired or wireless, and if the mouse is still not working even after changing the port, you can try re-installing drivers for the USB controllers. The USB controllers are responsible for handling USB ports, and re-installing them might fix the issue.
1. Press “Windows + R” to open the Run prompt and typedevmgmt.mscto open Device Manager.
2. Here, navigate to the bottom using Tab and arrow keys. Look for “Universal Serial Bus controllers“. Press the right arrow key to expand the menu.
3. Now, move to the first option “USB 3.XX eXtensible Host Controller“. Depending on the processor you are running, AMD or Intel might be affixed in the beginning. Next, press “Shift + F10” or “Fn + Shift + F10” to open the context menu. Choose “Uninstall device” from the right-click context menu and hit Enter.
4. On the next window, choose “Uninstall” and press Enter to confirm the uninstallation.
5. Similarly, move to “USB Root Hub (USB 3.0)” and uninstall it.
6. Finally, restart your PC using the “Alt + F4” shortcut and then connect your USB mouse. This time, Windows 11 will most probably detect the mouse without any issues.
If you are facing lag issues with your mouse on Windows 11, you just need to tweak a simple setting, and the latency will be gone. Follow the steps below.
1. Use the “Windows + I” keyboard shortcut to open Windows Settings. Now, press “Tab” to move to “Bluetooth and devices” settings in the left sidebar. Navigate to the “Mouse” settings on the right pane and open it.
2. Now, scroll down and open “Additional mouse settings“.
3. Move to the “Pointer Options” tab and disable “Enhance pointer precision”. This should fix the laggy mouse response you are experiencing on your Windows 11 computer.
Touchpad Not Working in Windows 11? Find the Fix Right Here
So these are the six ways you can fix the mouse or touchpad on your Windows 11 PC. I have mentioned solutions for all sorts of issues arising for the mouse or touchpad, you just need to follow the instructions, and you will have it working in no time. In case none of the methods worked for you, I will suggest getting a new wireless mouse. Anyway, that is all from us. If you have any queries, you can let us know in the comments section below.
TAGSWindows 111 CommentRecommended Articles1 Comment
Leave a ReplyCancel replyYour Comment
Your Name
Your Email *
Δ
REVIEWS8.6There’s no dearth of truly wireless earphones (TWS earphones) in the market, with options like the Nothing Ear 1 (watch our review), Realme Buds Q2, and others offering plenty of options to potential buyers. However, in the flagship segment, there […]
7.9Asus has been doubling down on its Chromebook lineup in India to cater to the needs of students during the ongoing pandemic. They have now released a series of Chromebooks in the lower-end segment, including the new Asus Chromebook CX1101, […]
8.2As 2021 draws to an end, the demand for portable computing continues to surge. With more people buying laptops than ever before to keep up their work from home shenanigans, interest is high everywhere. And while the likes of Lenovo […]
}})